After a relaxing day getting settled in yesterday, it was time to get out and explore some of this beautiful country. We took to the water with Diving Safaris in Playa Hermosa. Our Divemaster Lauren and Captain Moses took us to two local dive sites -- Argentina and La Tortuga -- a short 15 minute boat ride from Playa Hermosa. According to Lauren, the wet season was unusually dry creating good visibility to see the great amount of wildlife that inhabit these waters. Although there is no coral to speak of in Costa Rica, the huge quantities of plankton in the water attract a large amount of aquatic life to see. We saw puffer fish, scorpionfish, sea urchins with markings that glowed like a neon sign, eels, angelfish, triggerfish, parrotfish, huge spotted eagle rays, and a small group of white-tipped reef sharks. We also ran across countless schools of fish which I won't name as my fish identification skills are slightly lacking. Lauren informed us that spotting octopus, and sea turtles are not uncommon at these sites, but sadly we did not manage to catch a glimpse. Diving Safaris provided cookies, pineapple, water, and gear rental for the trip which lasted about 5 hours and includes a great surface interval on a secluded beach. A two tank dive cost $80 plus gear rental which runs $15. After a morning of diving be sure to check out AquaSport for lunch. Weird name for a lunch joint, I know, but the heart of palm salad and arroz con pulpo (octopus rice) is a perfect energy boost after some great diving. Check out Diving Safaris on the internet at http://www.costaricadiving.net/
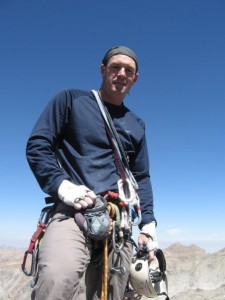 I posted last week that a friend of Adventure Insider underwent surgery to have a tumor removed from his brain. I am please to inform you that the surgery went well and Brian is on his way to recovery and looks forward to getting back on belay. In the mean time the climbing competition to raise money for this expensive surgery is planned for April 3, 2010 at the Sport Climbing Center in Colorado Springs, Colorado. Registration will begin at 5:30 and the competition will begin at 6:00. The cost is $10 for a very worth cause. Don't worry about you climbing ability, there will be prizes for all abilities in addition to raffles and an all around good time. A party will follow the competition. Members of Adventure Insider will be there including Erick, Shane, and CJ. Great prizes have been donated by Patagonia, Mountain Hardwear, Prana, Outdoor Research, Black Diamond, Diver's Reef, and NOLS to name a few. If you have questions please leave a comment and we will get back to you. We hope to see you there! [geo_mashup_map ]
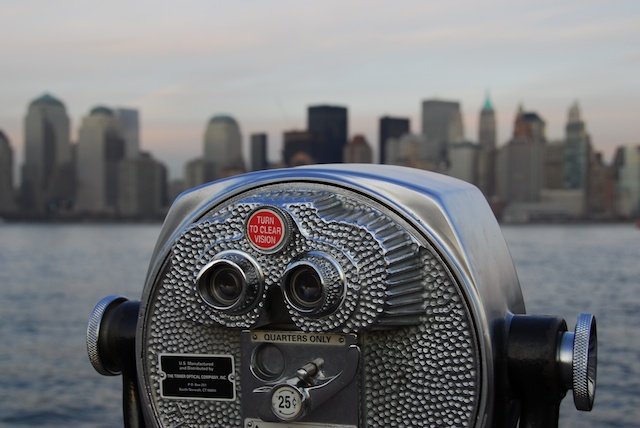
Your first visit to New York City can be an intimidating experience. NYC is big, fast, and unlike any other city in the world -- a true urban adventure. Just like any other adventure, the key to making your trip an enjoyable and exciting experience is to arm yourself with some knowledge before you go, make a plan, and leave a little room in that plan for the unexpected. This beginners guide should help get you pointed in the right direction.
Geography and Layout
I often describe NYC as a country of it's own, complete with states (the boroughs), and towns (neighborhoods). New York City is composed of five boroughs. Brooklyn, The Bronx, Manhattan, Queens, and Staten Island. Although each borough has great things to see, you're likely to spend most of your time in Manhattan (referred to as "the city" by locals). Manhattan is broken into many neighborhoods: the Upper West Side, Lower East Side, Murray Hill, and the Financial District to name a few. Don't be overly concerned about those, just know they exist. The streets in Manhattan are laid out in a grid pattern. Avenues run North-South and streets run East-West (see map below) with higher numbered streets to the North (uptown) and higher numbered avenues to the West. This can make it quite simple to figure out which way to walk once you understand the pattern. That said, below 14th St, things start to get to get a bit more confusing, and the whole of lower Manhattan is a jumble of named streets and tiny blocks. A map is key, and you may find yourself walking a block or two out of the way to figure out exactly where you are. There are also several NYC map applications for the iPhone that you may find helpful. Isn't technology wonderful?Getting There
Although it is possible drive into New York, it's not recommended. Bridge and tunnel tolls are deliberately high to discourage people from adding to the traffic congestion in Manhattan, street parking is extremely limited, and parking garages can be quite expensive. Navigating the city via the extensive network of buses and subway trains and the occasional taxi is not only much cheaper but also is often much quicker. So, it's probably not surprising that we recommend getting to the city by plane or by train.Airplane
There are three major international airports that service New York City: Newark, La Guardia, and John F. Kennedy. Newark is located in Newark, New Jersey whereas La Guardia and JFK are located in Queens (a borough of New York City). These airports are major hubs for many popular airlines, and JFK is a popular point of entry for many international flights. So, flights are easy to find and deals can be had if you're willing to spend some time shopping around. When shopping for flights most websites will allow you to use "NYC" as the destination which will generally search all three airports. Be careful however as searching for a round-trip ticket using this method will sometimes generate results that have you arriving into one airport and departing from a different one. Transportation to and from each airport requires the use of trains or a taxi. The information below should get you started. If you're coming in by train- From Newark you will need to ride the AirTrain to "Newark Liberty International Airport" stop where you can transfer to an NJ Transit train bound for Penn Station in Manhattan. Be aware there is also a Penn Station in Newark and you may need to change trains there. Train tickets are purchased at NJ Transit ticket machines and normally include the AirTrain and NJ Transit fares.
- From La Guardia you will need to take a bus. The M60 bus will take you to 125th Street in Manhattan where you can get on a number of subways.
- From JFK you can take the AirTrain. The AirTrain connects with the New York City Subway "A", "E", "J", and "Z" lines. The AirTrain connects with the "A" at the Howard Beach station. In order to get to the airport using this method you must be on a "Far Rockaway" train, not "Lefferts Boulevard". Connection with the "E", "J", and "Z" lines is at the Sutphin Boulevard station. You can also connect to the Long Island Rail Road to Penn Station.
Rail
Amtrak serves New York Penn Station, located in the Midtown Manhattan.Driving
Although not recommended, driving is an option. I-95, I-80, and I-78 all come into the city via the Holland Tunnel, Lincoln Tunnel, or the George Washington Bridge. Tolls can run upwards of $8 for the river crossing alone and traffic can be devilish.Where to Stay
When looking for a hotel be cautious, some aren't what they seem. Consult a credible source before booking your accommodations. Staying with someone you know in the area is always a great bet or for those more daring couch surfing is always an option. If you want to have a great experience and don't mind a little money for it check out the Kimpton Hotels, you can even bring your four-legged traveling companion. In addition there is a free wine hour every evening. If you are looking to go on the cheap, NYC also has numerous hostels to choose from. Outside that, there are literally thousands of hotels to meet most people's taste and budget.
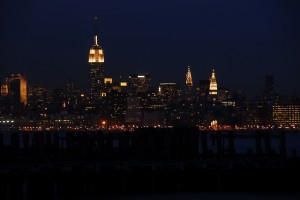
Getting Around
New York City is served by a great mass transit system consisting of 660 miles of subway track and 208 bus routes that serve some 7.6 Million people daily. Most subway lines and bus routes run 24/7 with reduced service during late night, holidays, and weekends. A free subway map can be picked up at a manned ticket booth is any subway station. Because the subway can be a little intimidating the first time you ride here are a few tips for your trip:
- Know the difference between local and express. Express trains don't make all stops.
- Read the signs. When transferring trains signs will point you in the right direction.
- When ascending or descending stairs or an escalator, stay to the right.
- Be ready to exit. During rush hour the trains can be very full. Don't decide at the last moment you need to get off.
- Know the stop before and after the one you want. This will help you prepare and also serves as a backstop if you happen to miss your stop.
- When getting on a train, do not stand in front of the doors. Stand to the side and let people off before you board. Trust me it's quicker. Also, when exiting don't stop and look for signs/maps until you are well clear. This just slows down the people who know where they are going.
- Knowing the layout of Manhattan streets and avenues can aide your subway exit. Many exits are marked with the intersection and the side of the street it will come up on. Not only will this aid you in using the right exit but you won't have to ask for directions.
- If you are not sure of something, ask. New Yorkers have a reputation for being rude but will generally help if simply asked.
- Be clear on where you want to go. The drivers may not know the name of the restaurant so give an intersection or street with cross streets. For example, if you're headed to Katz's Delicatessen for some pastrami on rye and a glimpse of the table from that famous scene in 'When Harry met Sally' you can ask your cab driver to drop you at Houston (pronounced HOW-stun, not like that city in Texas) and Ludlow.
- Available cabs will have the number on the top of the cab illuminated. If it is extinguished it is occupied and if the outer lights are on the driver is off duty. Check out this post on Abroad'r View for more on cab tips and etiquette.
- Be ready with payment. All yellow cabs now accept credit cards, but be ready with cash just in case.
What to See
Food
New York is known to have some of the best restaurants on the planet. There are plenty of very well known high end restaurants such as Per Se, Jean Georges and Daniel but there are thousands of restaurants that offer some of the best food at a much more casual atmosphere and more reasonable price. Below are my personal favorites that I would recommend to anyone. Keep in mind that inexpensive in NY may be skewed compared to what you are normally accustomed to.Inexpensive
- Vanessa's Dumpling House - If you like dumplings, don't miss Vanessa's. This place is crazy cheap, and delicious.
- The Bourgeouis Pig Cafe - The cure for your fondue cravings.
- La Palapa - Great Mexican food and of course, margaritas.
Not as Inexpensive
- Blue Smoke - A phenomenal BBQ joint run by the famed Danny Meyer. Live jazz is played seven days a week downstairs.
- The Little Owl - Casual yet upscale dining in Greenwich Village (a neighborhood on the lower east side).
- Blue Hill Farms - A restaurant inspired by an upstate farm that sources their food only from local farms.
Pizza
Because it's such a popular question I will devote a section to Pizza. One thing that is not and never will be decided is where the best pizza is in NYC. Instead, decide for yourself.- Lombardi's - The first licensed pizzeria in NYC.
- John's - Avoid the one in Times Square and head to the original on Bleeker Street.
- Grimaldi's - Under the Brooklyn Bridge (on the Brooklyn side) this small place offers some of the best 'pie' in the city.
Drinks
- Dive 75 - Fun little place uptown complete with Jenga and Connect Four.
- The Little Branch - Get a lesson in all things alcohol.
- The Back Room - Enjoy your drinks in teacups, an ode to the prohibition era, in the main room.
- Death and Company - A small, dark, upscale and trendy place.
- Brandy Library Lounge - Select a glass of your favorite nightcap from what is the largest selection of brandy and scotch I have ever seen.
- The Other Room - A collection of three bars that are great for dates.
Places
There are tons of guides filled with information on what not to miss and surely you have your own list. Here are a few places I take people who come visit.- Grand Central Terminal - One of the icons of New York. Check out the Campbell Apartment inside, now a bar.
- Public Library Main Reading Room - Visit the reading room
- Ellis Island - Catch the ferry at the terminal in Battery Park to visit The Statue of Liberty (reservations are required to visit her crown) and Ellis Island. Perhaps you can find your ancestors in their extensive registry.
- Central Park - Without the 843 acre park there would be 8 million crazy (crazier?) New Yorkers.
- Museums - From the Museum of Modern Art to the Museum of Natural History to the Museum of Sex and everything in between.
Resources
Google Maps (including mobile) give transit directions in NYC and if you do have a mobile version for your phone will help with walking directions as well. There are numerous guides as well. One favorite of mine is the Not For Tourist (NFT) Guide (Buy).Links
- MTA - Mass Transit Authority. The operator of NYC subways and buses.
- NJT - New Jersey Transit. Operates Newark AirTrain and connecting train to New York Penn Station.
- Amtrak - Amtrak serves New York Penn Station.
- Newark - Newark Liberty International Airport
- La Guardia - La Guardia International Airport
- JFK - JFK International Airport
Check out this hilarous video on cross-country snowboarding, a sport that is sure to take off. http://www.youtube.com/watch?v=4w7sVSMbjyM
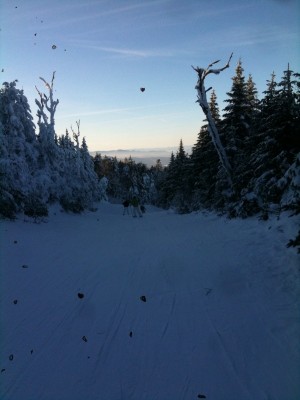 Saturday I took a day trip to Okemo Mountain in Vermont without having to drive a single mile. The latest way to get to the slopes from Brooklyn is the Brooklyn Ski Bus. Departing from Park Slope at 5am most Friday, Saturday, and Sundays, the Brooklyn Ski Bus will take you to many ski resorts in the area while you relax and sleep it off. The bus deposits you back at the pick-up point about 8pm. With prices ranging from $89 to $109 including transportation, lift ticket, and snacks and drinks (non-alcoholic) the Brooklyn Ski Bus is a good value and certainly saves a headache or two. Check out http://www.brooklynskibus.com/ for more information and a calender of trips.
At Adventure Insider, we really look for adventures that are (to use a cliché) off the beaten path. We don’t want to cover the same trips that every other publication and website cover, and we really like our solitude.
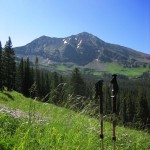
This past summer, this desire led us to the Raggeds Wilderness, near Crested Butte, Colorado. There are literally hundreds of great places in Colorado for a multi-day backpacking trip, but what intrigued us about the Raggeds is that there is not much written about the area. In fact, we had a little difficulty finding which trails would meet our collective skill level (intermediate), and provide the great escape we really love. Both of those requests were answered with the route we chose. Starting from just outside the Erickson Springs campground (38.954157°,-107.270606°), we headed up the Dark Canyon Trail (#830). Our plan was to try to make our base camp near the beginning of Oh Be Joyful Pass trail on Silver Basin Trail (#836). Unfortunately there had been quite a bit of rain (and a few good showers that first day), so our first 6 miles were pretty slow going. By the time we got to our first big ascent “Devlis Stairway” (38.949329°,-107.192316°) the ground was muddy, sloppy, and almost impassible. Once we got up this ascent the sun was already starting to fade, so we decided to call it a night.
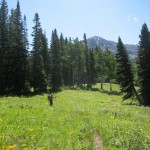
The next morning was much drier, so before long we were at the intersection of the Dark Canyon trail & the Silver Basin Trail. We were planning to head up silver basin trail to our base camp at the bottom of Oh Be Joyful Pass (OBJ) trail. Fortunately we picked up the Trails Illustrated map (Kebler Pass/Paonia Reservoir #133) that pointed out the fact that our original base camp was no where near water, so we decided to continue up Oh Be Joyful Pass trail to find a good spot. ~|~[caption id="attachment_741" align="alignleft" width="150" caption="Heading up the trail"]

Not far along the OBJ trail is a good size ridge with a great overlook to the valley below. We decided this would make a great stopping point (Base Camp: 38.937108°,-107.142046°) for the night since we needed to get some video & photos for reviews on several products (see MH Helion Tent Review & Therm-A-Rest Neo Air Review). Although we didn’t make it, if you have the time I highly recommend you summit Oh Be Joyful pass (38.939714°,-107.115604°).
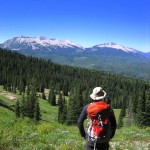
The downhill part of our trip went pretty quickly, but there were plenty of great views on the way down. The last 3-4 miles are very popular for those with horses, so watch your step. After getting back to the car, it was a short 20 minute ride to retrieve the FJ at the north parking area, and then back through Crested Butte to Gunnison for steaks and beer.
How to get there
To hike this trip from North to South (as we did) take CR-12 north from Crested Butte (you can also get to CR-12 from the north off of CO-133). You can also hike from south to north, which is less steep than our route.Permits/Regulations
No permits are required to hike in the Raggeds Wilderness. Review all wilderness regulations for restrictions.Outfitters
Gunnison is the closest town with several backpacking / outdoors shops. You’ll be able to find anything forgotten or missing there. Expect to pay a small premium for goods purchased in a mountain town.Summary
This is a great trip to get away from the loads of people in many of Colorado’s back country areas during peak season. You’ll experience several types of terrain that can be challenging at times. We’re looking forward to exploring this area again in the future.Quick Info
Location: Raggeds Wilderness, Colorado, USA (Info) Permits: None required. Distance: 18mi (But several trails offer shorter/longer routes) Difficulty (1-10): Our route was intermediate (5-6) Maps: Kebler Pass/Paonia Reservoir Trails Illustrated #133. (Buy) Download Google Earth KML [geo_mashup_map]Recently Pete Athans led a National Geographic team on a first ascent in Nepal. What is unique about this is they were climbing to an ancient set of ruins to recover ancient manuscripts. At one point setting three foot deep anchors only to watch them crumble. (Via National Geographic Adventure) http://ngadventure.typepad.com/blog/2009/11/relics-recovered-a-pair-of-worldclass-climbers-goes-where-archaeologists-cant.html
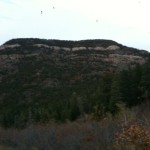
While in New Mexico on business I had a chance to to get away for a couple hours to do some climbing at La Palomas Peak outside Albuquerque, New Mexico. I'll spare you the details as the can be found in the fairly comprehensive guide located at http://www.cs.unm.edu/~moret/crag.html. I will, however share some things that may not be obvious...at least not to me. First, the trail. I immediately set of on a faint trail behind the barriers when I should have walked south (up) on the road about 50 feet to an obvious trail. Second, you may be able to pick this up from the guide but the routes are very short. Just as you start to get warmed up you top out. All in all this is a great site to do some climbing if you are in the area, especially if you are looking to do a little teaching. With routes ranging from 5.4 to 5.13 there is a great variety to choose from. [geo_mashup_map]
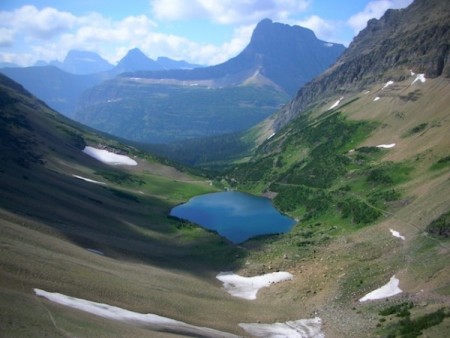 I headed off to Montana with the plan of backpacking the Coal/Nyack Creek Loop in the southern region of Glacier National Park. I had seen from the online trail reportsthat there had been some avalanches in the area resulting in quite a few trees down and waist high river crossing about a week before my visit. What I failed to realize from the report was the sheer numbers of trees that would have to be negotiated in order to complete the loop. The rangers at the permit office put the number at somewhere in the 'many hundreds'. With that bit of information, we changed our plans. The ranger then helped set up a trip that he was sure would be worth the effort. Worth the trip it was! Let me start by saying I, as a general rule, try to avoid trips that require a lottery, are over-populated, and even require a permit if possible. That said, the trip to Glacier was absolutely worth the hassle of the permitting process. It was a fortunate set of circumstances that we happened to be at the west end of the park and started our backcountry the following day on the east end of the park. This required us to drive the Going-to-the-Sun Road that traverses the park east-west and is more than likely the best 50 miles you will ever drive. Mountain goats, waterfalls, glacial valleys, and wild berries are just a few of the wonderful things you will experience on this trip. It is worth the trip even if happens to take you out of the way.
Day 0
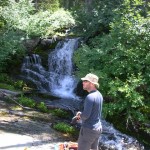 After dropping our car at the Chief Mountain Trailhead (our terminus) we took the shuttle to Many Glacier and acquired a hiker/biker campsite. Although these are communal campsites it is best to inquire about them before dropping you car, cost: $5/person. Pizza and a couple beers that evening at the Many Glacier General Store hit the spot and the next morning we hit the trail. Now, before I divulge our itinerary I want to point out that there are so many remarkable places in Glacier that almost any combination of campsites is worth the trip. Also keep in mind the big passes that can be downright intimidating are some of the most magnificent places to see.
Day 1
Over Ptarmigan pass and through Ptarmigan Tunnel (yes, it's an actual tunnel). Upon exiting the tunnel you will see Elizabeth lake far below you. Continuing down the trail will bring Helen Lake into view along with many peaks sporting glaciers and huge waterfalls. Further down the trail we merged with the Continental Divide Trail and eventually arrived at Elizabeth Lake (Foot) Campground. From there it was a magnificent hike to Elizabeth Lake (Head) Campground for the night. Here there is a little sandbar 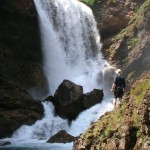 that you can ford out to for a little relaxation sitting in a glacial valley surrounded by numerous peaks and ridges. In hindsight I think continuing another couple miles to Helen Lake Campground would be worth the little extra effort.
Day 2
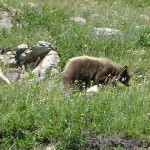
Heading back towards the foot of Elizabeth Lake and continuing to Cosley Lake Campground. On the route we passed Dawn Mist Falls and were pleased to see a small spur that leads to the bottom of the falls. This spur is only about a tenth of mile long is pretty much flat, making the side trip for lunch and a refreshing dip a no-brainer. The trail is pretty flat and wandering until we reached a river fording about a half mile from the campground. After the ford and re-installing our feet in our shoes we proceeded the last half mile where we saw a black bear scavenging berries and decided to help ourselves as well, after we were well clear of the bear. Cosely Lake sits at the base of a cliff and is fed by the run off from Stoney Indian Pass. A fishing pole here may serve as one of the better items to bring. Here, each campsite is along the water with a thin stand of brush and trees and a personal trail leading to the water. Deer are very prominent in this area and tend to crave the salt we bring along. I caught a doe licking the handles of my trekking poles numerous times even as I approached her.
Day 3
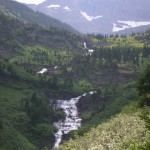
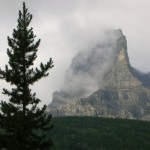 We continued west a short distance to Mokowanis Junction Campground. Due to the short day we decided to take a day hike after lunch and a nap. Mokowanis Lake is reported by one guide we met, to be a great spot for a swim. Stoney Indian Pass offers glacier pools coupled with waterfalls and steep climbing. We chose the pass, and we not at all disappointed. Huge waterfalls and a dip in a 58° glacial pond was what the doctor ordered. This was by far the pinnacle of the trip and is what has me wanting to return again.
Day 4
Backtracking day. Heading east now past Cosley Lake a few miles into Gable Creek Campground. Hiking the vistas of the park and picking wild berries to munch on made the day memorable.
Day 5
The end of the road. Heading out to Chief Mountain was the slowest going on the entire trip. Made extremely muddy by the recent rains the trail was tough to negotiate and at times almost frustrating. A steep incline followed by some wandering finishes at the Chief Mountain Trailhead.
Planning
How to get there
 Both Missoula (164 mi.) and Great Falls (203 mi.) are served by major airlines with car rental services available. Destinations closer to the park may be served by smaller airlines or connectors. The drive to park is straight forward although there is some construction on US-93 north of Missoula as of this writing. Another notable is the utterly delicious Montana Wheat located at the junction of US-93 and Hwy 35. There is also a grocery store there for last minute items. Make sure you stop for some Flathead Cherries that are grown in orchards right along your drive and sold at the numerous stands dotting the road.
Permits
Due to the popularity of the park, permits can be hard to come by for Glacier. Advanced reservation lotteries are in effect but a certain percentage of each campground is held for walk in reservation available to day before you wish to start. Due to the high possibility of changes, check the Glacier National Park Backcountry Campingpage for up to date information.
Outfitters
Many outfitter near glacier are more than happy to help you find that item you forgot at home. If you need a place to get a new tent, get a new sleeping bag, or get that new Therm-a-Rest Neo Air you can stop by REI in Missoula.
Summary
 If Glacier isn't on your list, it should be. If it is, it should be higher. Glacier National park is truly an amazing place to visit, it's just a shame it's so popular as it makes it tough to keep to the 'insiders'.
Quick Info
Location: Glacier National Park, Montana, USA Permits: Required. By lottery or walk-in (see above) Distance: Varies Difficulty (1-10): Varies Beta: Glacier N.P. Trails Illustrated. Available for the whole park and in larger scale for sections of the park. (Buy) http://www.nps.gov/glac [geo_mashup_map]
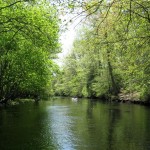
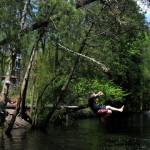
With summer here it's a great time to brush up on your canoeing and kayaking skills. A prime place to do that is in the Pine Barrens region of Southern New Jersey on the Wading River. Pick up some sandwiches for lunch and rent a canoe or kayak (single or double) from Micks Canoe and Kayak Rental (http://www.mickscanoerental.com/) and pick your poison. Mick's offers put-in and take-out points that will yield trip lengths of between 4.1 and 15.7 miles. Camping is also an option along the river. One great option for a nice day includes a put-in at Hawkin Bridge for a three hour, 5.8 mile cruise. Extending the trip a bit down to Beaver Branch will take about five hours to travel the 9.8 miles. Any route you choose will not leave you bored. The winding river is full of downed (but passable) trees, and a few small tributaries will keep you on your toes. This is also a great opportunity to get your favorite four-legged explorer out for some action with the family. Mick's will transport dogs in the bus to and from the river. So grab the dog, pick up some sandwiches and get on the river. Our thanks to our friend Rabecca Shaw for allowing us to use her pictures. [geo_mashup_map]
]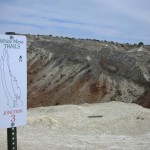 When it's mountain biking season and you find yourself near central New Mexico, White Mesa is the place to head. With a trail to meet everyone's ability, White Mesa makes the perfect day trip for some great riding. The area consists of over 15 miles of trail, ranging from beginner to advanced. The White Mesa area is administered by the Bureau of Land Management (BLM) and is well marked and mapped. Although primarily used for biking, hiking is allowed on the entire trail system and equestrian use is permitted on a portion of the trails.
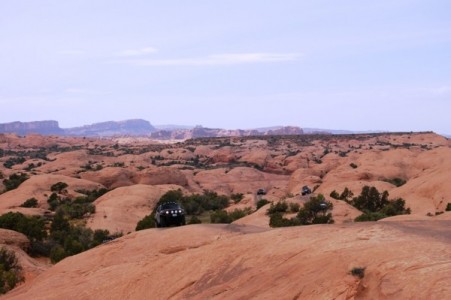 For those interested in off road and 4-wheel driving, the ‘must see’ destination is Moab, UT. Moab is known around the world as the center of the 4x4 universe, mainly due to it’s fair weather and ‘slickrock’ trails. For our first ever trip to Moab, we made the 7 hour journey from Colorado for the annual Cruise Moab event. Cruise Moab is a Toyota-only event sponsored by the Rising Sun 4 Wheel Drive club out of Denver, CO. They’re part of the Toyota-Land Cruiser Association (TLCA), a nationwide Toyota 4x4 club. This years’ event featured over 100 Toyota 4x4 trucks, nearly 400 people, and plenty of vendors selling everything from roof racks to suspension lifts. We managed to run two trails with the Cruise Moab group, and then set out for one on our own the last day. While there are dozens of off road trails in the Moab area, we opted to go with two of the most scenic trails for our group runs.
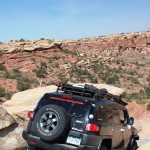 About 90 minutes south of Moab is Canyonlands National Park, and Elephant Hill trail. If you’re looking for a moderate trail with amazing views – this is the one to try. It will take a slightly modified vehicle (a lift and larger tires are helpful) in some sections, and a fair bit of driver skill is necessary. If you’re not new to off road driving, you should have no problem navigating the obstacles on this 17 mile trail. There is one section that requires you to back down (and then back up on the way out), so make sure you have a good spotter and take your time. Toward the end of the loop you’ll have an opportunity to hike out to an area that overlooks the Colorado River. You’ll want to plan to be on the trail for the entire day, so bring plenty of food and extra water. One other important note: while pets are allowed in the park, due to the sensitive soil they are not permitted on back country and 4x4 roads, so leave them at home for this trip. Perhaps the most famous trail in Moab is Fins N’ Things. This easy to moderate trail gets its name due to the large rock fins that you spend most of your time driving on. This is the classic ‘slickrock’ that Moab is famous for, and Fins N’ Things has plenty of it. There are two different legs of the trail, totaling about 10 miles of trail driving. While this trail is fairly easy for experienced off road drivers, you’ll still want to make sure you have a good spotter for some of the sections. A rear differential locker is needed for some of the obstacles, but there is usually a bypass. When you’re not on a trail in Moab, there’s still plenty to do.
There are several micro-breweries in town, and many of the restaurants are top-notch. We really enjoyed the burgers and brew at the Moab Brewery, on South Main St. They feature eight types of beer, so you’re sure to find one that suits you. For breakfast, our favorite place was the Jailhouse Café. It’s so named because it’s actually housed in the original Moab jail house. The food is excellent, but the prices are a little on the steep side.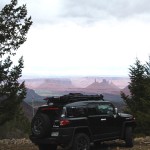 There are literally dozens of places to stay in Moab. If you’re ready for a regular room after a day on the trail, you have a choice of nearly every hotel chain somewhere along main street. For campers, there are a couple of really great campgrounds to choose from. The main Cruise Moab event was held at the Slickrock Campground, which is very large has plenty of trees. We opted to stay at the Moab Rim Campark, just south of downtown Moab. We were able to get a cabin that included 1 queen bed, 2 bunkbeds, a kitchenette, and a small bathroom. The best part was that Moab Rim allows pets, so our two medium sized dogs felt right at home. If you’re in to off road driving and haven’t been, you’ll want to make plans to get out to Moab. The trails and scenery are world class, and there are plenty of fun activities to keep the entire family entertained. If you like the group feel, check out Cruise Moab, Easter Jeep Safari, or any of the other events held annually. Of course you can always just gather your friends for a self-guided tour of slickrock country. Either way, you’re sure to have an amazing time in Moab.
Quick Info
Location: Moab, Utah, USA Season: Early Spring to Late Fall Permits: None, but National Park Entrance fees may apply Distance: Varies Difficulty (1-10): Varies Reference: Guide to Moab, UT Backroads (Buy) [geo_mashup_map]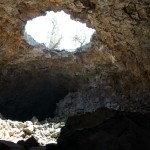 Created millions of years ago by lava flows covering the region, the lava tubes of El Malpais National Monument make a very exciting day trip or weekend over night trip. The most exciting parts of the area are the lava tubes that were created when lava on the outside of the flow hardened and the molten center continued to flow. This created tubes that are very exciting to explore. Although, there are no trails to speak of, cairns mark the way from cave to cave. A flier is also available at the trailhead with a crude map. Bring your headlamp if you plan to explore the caves, not much sunlight gets in. Sturdy boots, leather gloves, and knee pa
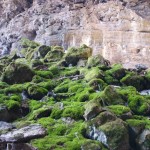 ds are a good idea as well. Remember, if you don't feel comfortable with where your are going, don't go. For those that want to explore the caves a great adventure awaits you. Also remember to bring all your water with you, there is none available in the monument.
Primitive camping is allowed in the monument without a fee or permit.

